How do I create a page in my project?
Learn how to create and manage pages for your Blutui project through the dashboard.
Introduction
Now it’s time to create a page for your Blutui project.
There are two ways to do this:
- Create a page directly inside the
pagesdirectory of your project. - Create and manage the page through the Blutui dashboard using a layout.
Both approaches work, but creating and managing pages from the dashboard offers greater flexibility, allowing you to edit content, control visibility, and manage metadata without touching code.
This guide will focus on creating a page from the dashboard.
Creating a page
Ensure you have a layout
Before creating a page, make sure you’ve set up a layout.
Follow this guide to create your first layout:
How do I create a layout?
Go to the Pages section in your project dashboard
Open your project in the Blutui dashboard and navigate to the Pages section.
Click Add Page to create a new one.
Configure your page details
You’ll see a form with several options to configure your page:
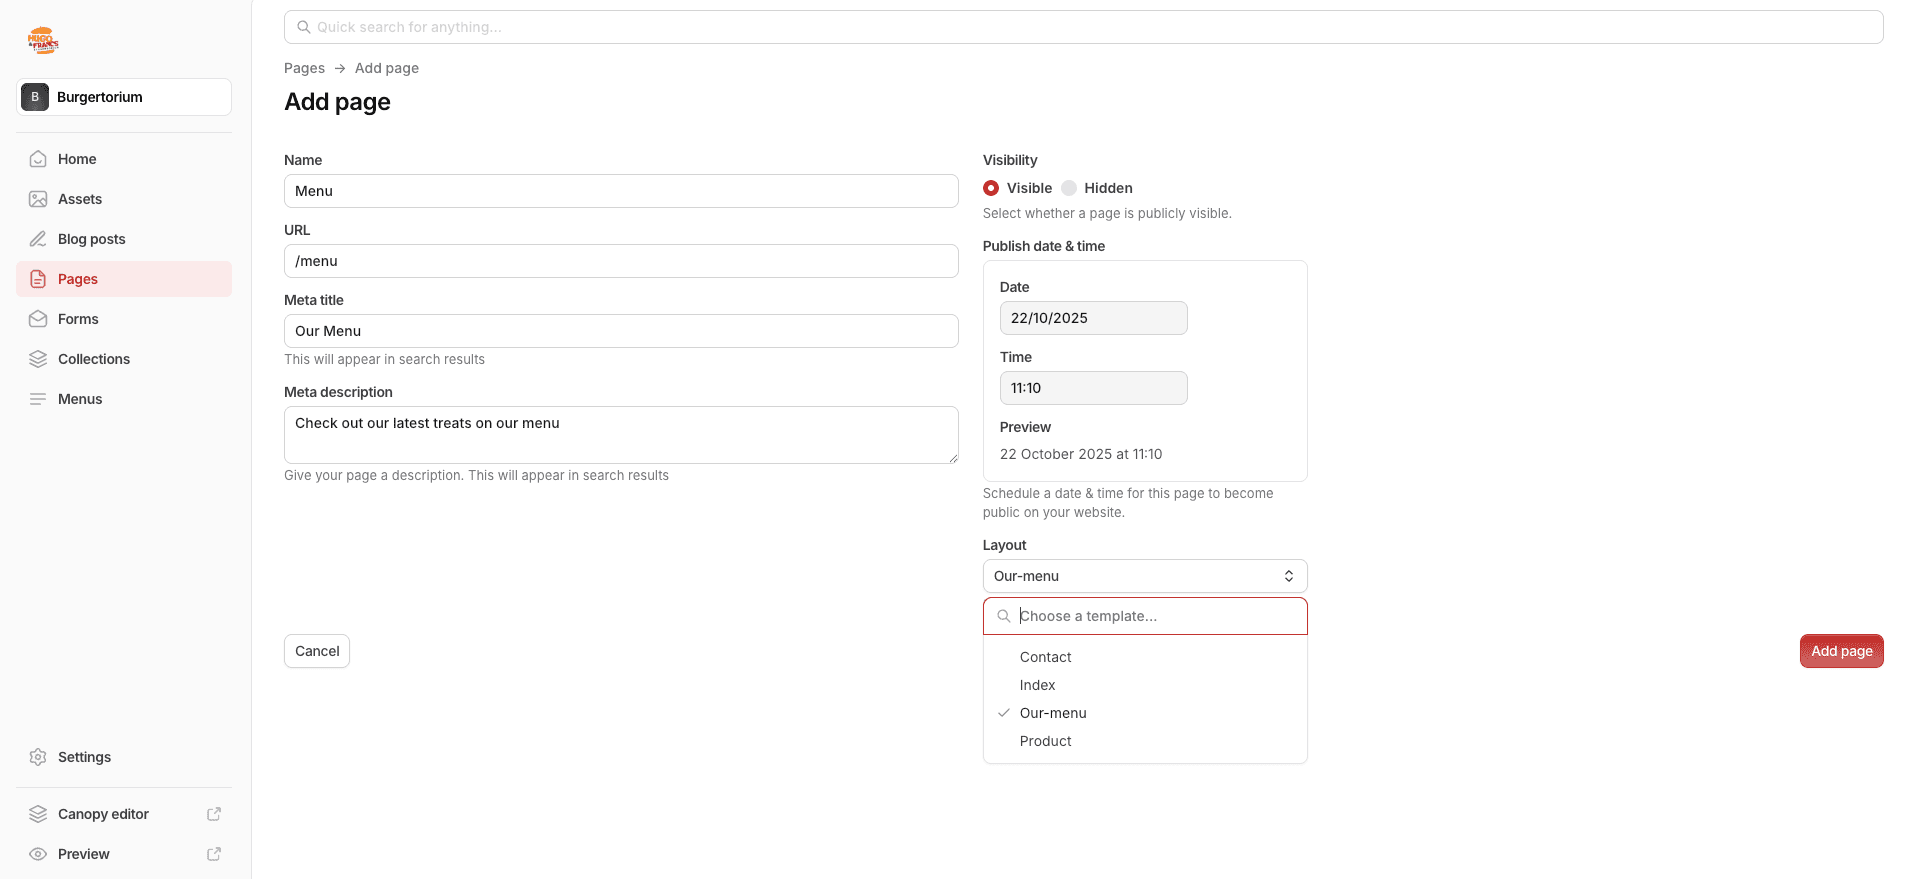
- Name — The internal name for your page.
- URL — The public address where your page can be accessed.
- Meta title and Meta description — Used for SEO and search results.
- Publish date & time — Schedule when your page goes live.
- Layout — Select a layout template from your
layoutsfolder.
If your desired layout doesn’t appear, make sure you’ve run:
courier pushor have courier dev running locally to sync your layout files.
Save and preview your page
Once you’ve filled out the details and selected a layout, save your page. You can now visit your page using the URL you defined in the form.
Next steps
Now that your page is created and visible, it’s time to make it editable by adding Canopy elements to your layout. This allows content editors to update text, images, and other components directly from the dashboard.
Last updated on